Wednesday, August 31, 2011

The cutest little purses

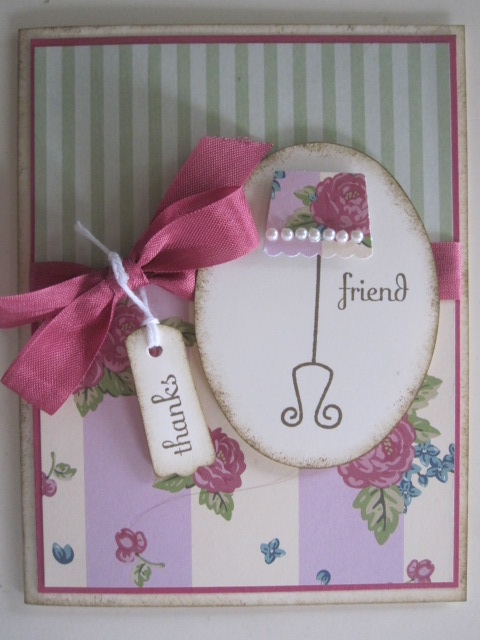
How cute are these little purses? I saw these on a blog....can't for the life of me remember which one either.....and I knew that I just had to make some for my club girls. These are the little thank yous I added to their club orders this month. They are sooooo easy to make too. They are made with a 6"x6" piece of paper. If I can't find the tutorial that I used, and if anyone is interested, I will gladly do a tutorial here. They are just that much fun to make, and I think that cute too.
For mine, I added a Twix candy bar in the middle,but anything could go in there. I think these would be so cute in Halloween paper with some treats, or even a cute way to package a small gift. The possibilities are endless. So what would you put in yours????

Thanks for peeking in today.

If you would like to know how to make these, just leave me a comment of shoot me an email, and I will show you how.

Have a wonderful day.

Tuesday, August 30, 2011

Even the naughty deserve somthing nice

This is the last of the tags I've been making I promise.

I do have to say that I think this tag turned out fun. I have been having soooo much fun making these rosettes/lollies whatever you want to call them, so i thought it would be fun to put on a tag. To make these fun lollies I just cut a 12" x 1" piece of DSP. Then I used my new simply scored and scored it every 1/4", then folded it back and forth. I attached the two ends together with some sticky strip, and to keep it flat I just pressed it down and then poured a little crystal effects in the middle to keep its shape. I added the 1 3/4" punched circle and just held it for a little while and it was secured. I can't wait to make more wreaths for Thanksgiving and Christmas with those lollies. If you haven't made a lollie yet, you should try it. They really are addicting. Here is a sideways view....sorry....of all 11.
I think when I get my swaps from the other people for these tags that I will have plenty of Christmas tags for my presents this year. I can't wait to get them in the mail and show you what clever tags other people came up with.

Until then, thanks for peeking in.

Monday, August 29, 2011

Do Not Open Till Christmas

Here is one more of the tags I made for the swap I signed up for. I had signed up for the "Do Not Open till Christmas" stamp, and I wasn't sure what I was going to do with it. It is a small stamp, and I wanted to make a bigger tag. As I was sitting at my desk thinking, I looked over and saw a tag very similar to this one for a birthday tag, and knew this is what I would do with the stamp. The blurry thing at the bottom of the tag is 3 little rhinestones for some bling. I think this little tag would make a Christmas gift look fun.
Thanks for peeking in today.
Have a great day.

Sunday, August 28, 2011

More Christmas tags

I have to say that signing up for a tag swap was a great idea. It has really motivated me to start getting ready for Christmas. I usually wait until the last minute and then just don't end up doing anything.....can anyone else relate to this?

Anyway, I kept these particular tags pretty simple. I just layered some Wild Wasabi, Cherry Cobbler and Natural White and punched out some pennants from the pennant punch. I did have to add a little bling to the top for the star, but I like the simplicity of them. They made up pretty quickly, so I'm thinking of making a stack for myself to have on hand. When I made these I was watching The Bachelor Pad.....a silly vice of mine....and now everytime I see these tags, I think of that episode. Hopefully, by Christmas that memory will be gone and I will think of something not so stupid....hahahahaha Here is a close up of the tag all alone.

I wonder what fun gift this will end up on at Christmas. It's crazy to think that Christmas is only 4 months away. Heck, I can't believe summer is over already. I get the pleasure of going back to work again tomorrow. boo!!! I guess I should just be grateful that I have a job, and that I have summers off. I'm really grateful to work with a great teacher, it's just those rude, disrespectful students that get in the way of making my job enjoyable.

Enough complaining.


Thanks for peeking in today.

Tomorrow I have some more tags to share.

See ya then.


Sunday, August 21, 2011

Trick or treat

I was trying to come up with some fun things to show my customers what they could do with DSP.....it is on special for a few more days ya know. Anyway, I thought it would be fun to decorate one of our #2 boxes using the Big Shot. I just cut one out with some Basic Black and then used the new Frightful Sight DSP and wrapped a band of DSP around it. Then I made one of those cute little scalloped rosettes using the 2 1/2" scallop circle punch. The frankie image in front is from the new Spooky Bingo Bits stamp set. I'm really having fun with that one right now. As you can see I took some satin white ribbon and wrapped it around the box.....before I added the embellishment on the front of course.....and then tied a cute little bow. What's inside you ask???? Well.....
...what's a Halloween treat without candy? So, I covered some Hershey's nuggets with the new stamp set coming out in the new Holiday mini catalog...It's a wrap Holidays. I stamped my image on some address labels and they fit perfectly. I love it. I do have to say that Hershey's has a policy where you are not supposed to cover their wrapper like this. You have to make it so the covering can slide off. I wasn't in the mood to do that, so I just covered them directly. I think it's because they contain nuts and people need to know that that have nut allergies....or it could be that they don't want their name covered up too....Whatever the case, I'm not going to worry about the Hershey police coming after me for giving these to a friend. I will make sure they know there are nuts in there.

Pretty cute and fun huh??? Not to mention YUMMY!!!!!


Thanks for peeking in today.


Saturday, August 20, 2011

How about a matching card for that cupcake throne

So, two posts ago, I showed you these cute little cupcake thrones that we made at club Thursday night. Well, I got to thinking, why not make a matching card to go with that cute little cupcake throne, so here it is. It just looks soooo much better with a yummy cupcake holding it I must say. I added a matching cupcake pick as well. Sometimes matchy matchy is good, and sometimes not so much. This time, it's good!!!
And then here is the matching card. When you already have the stuff out to make the cupcake throne, this cards makes up really fast and easy. Now, who shall I give this yumminess and cuteness too????

If it's your birthday today or soon, then Happy Birthday to you!


Thanks for peeking in today.

See you tomorrow for a cute little Halloween treat I made.

Friday, August 19, 2011

to my Friend...

As I have mentioned on my blog before, I get tons of great ideas on a Stampin Up demonstrator website. This card was one of them. I can't remember who it is from. Do you recognize the middle of those flowers? They are from the lace ribbon border punch. You just punch out the little middle with your 1" circle punch and you get that cute little piece. As you can see, I've used the Friendly Phrases for the sentiment again. I had to hide the fact that I stamped that leaf up a little higher so it would give the flowers height. So, I just punched some real red with the curly label punch and then the sentiment was punched using the large oval and then I just layered them and popped them up on dimensionals.

This card made up really quickly. Perfect for when you need a card really quickly and your stash is running low.


Thanks for peeking in today.

See you again soon.

Thursday, August 18, 2011

Cupcake Thrones

How stinking cute would it be to receive one of these .....only with a delicious cupcake inside that circle???? We are making these adorable little things in club tonight. I wanted to have a few different ones for display. I thought this would be cute for just a muffin, for a coworker one day....If you look really close, you can see that one of my corners on my pinwheel got loose. Ooops.
This is the one we will actually be making tonight. I hope the ladies think they are as cute as I do. They are really easy to make too. I got the tutorial from the amazingly talented Janine Tinkelberg. You can get the tutorial from her blog here.

Thanks for peeking in today.

Wednesday, August 17, 2011

New and old combined

This card is a NEW technique.....for me....and some retired (old) supplies. Tomorrow in club we are going to make the doily card I posted a few posts back, and I wanted to show the ladies that the technique is so versatile with so many different stamp sets. This time I used the Just Believe stamp set and embossed it with white ep, and then with my sponge dauber I rubbed some Soft Suede ink over the image. For the DSP on the bottom, that was retired paper as well as the ribbon. I believe that you can still get them both on the clearance rack, if anyone is interested in still getting those. The sentiment is from Friendly Phrases....I love that stamp set. Here you can see how the image really pops when you rub the ink over it.
Thanks for peekin in today.
I hope your week is going great. I can't believe that we are more than halfway through August already. Man, where does time go?

Tuesday, August 16, 2011

Christmas tags already???

Yep....christmas tags already. I am always running behind when it comes to the holidays so I decided to get a jump on it. And.....I joined a christmas tag swap. So, I get the pleasure of making 40 different christmas tags and then I will get 40 different ones back. I'm excited to see what comes back. But in the meantime, this is one of the 4 different styles that I have decided to do. I'm making it after the style of tags we made at Convention. It uses the natural white cardstock. I really like this cardstock and had never used it before. If you haven't tried it, you should. I used the Polar Party stamp set and just colored him in with my stampin up markers. Then for the snow on the bottom, I used the new dazzling details from the upcoming holiday mini catalog. Have you gotten your catalog in the mail yet? If not, and you want one, just shoot me an email and I will get you one ASAP. I think every house needs one of these!!!!
So, do you want to know how to make such a perfect curve for the top of this tag? Well, I'm glad you asked because I happened to take a picture so you could see how easy it really is to do. You just take one of the ends and put it in the 2 1/2" circle punch from the back .... just like this....

Easy peasy huh? So, now go try this fun technique yourself. It's never to early to get a jump on the holidays.


Thanks for peeking in today.

I hope you have a wonderful Tuesday.

Monday, August 15, 2011

Spooky

When I got my hands on the new Holiday Mini catalog I saw the cutest wreath on page 6. I knew I was going to be making one of those, and having won the new Simply Scored Scoring Tool, I had NO excuses. But, instead of making it a fall wreath, I wanted to start by making mine a Halloween wreath. I think it turned out pretty cute.


Here is a close up of the bow and that darling little lolli with the spooky in the middle. These lollis are really becoming quite popular. They are really fun to make too. As you can see it uses all different sizes of these lollies. The bigger ones I cut them at 2" and then scored them every 1/4" and just folded back and forth and connected the ends together and then glued them down to a piece of 1" punched circle to help hold them together. Then I cute some at 1 1/2" and the smaller ones at 1" and did the same as the 2" lollies.
For the base that I glued them on I just used the thick white paper that comes in the DSP pack of paper. I used one plate to outline the outside diameter and then for the circle in the middle, I just used a smaller plate, then cut them out by hand. It worked perfectly.
As you can see I used the Frightful Sight DSP from the new catalog and I also used the new Spooky Bingo Bits stamp set on a few of the lollies.
I made this so I could show my club ladies some fun things they can do with the DSP since it's on special this month.

Thanks for peeking in.
Have a wonderful day.

Sunday, August 14, 2011

Look familiar???/

I know you guys are thinking, wait a minute, you've already posted this card. Well, I kinda did. But that card was the sample I used to make this one. This card is a case from Convention. I was so excited to get all my new goodies I preordered from the new Holiday Mini catalog. This is the first thing I made. I'm so sad to say that after punching out the first two stockings just fine with my new stocking punch.....yes, that is a new item in the Holiday Mini coming up.....yippee....but, the third time I went to punch one out.....it wouldn't punch it. I was sooooooo sad. I am going to have send that punch back to get a new one. I know they have been having problems with some of the punches, but I was hoping to never be a victim of that problem....unfortunately that didn't pan out for me. Anyways, it really is a fun card, and when I get my new ..... working punch.....I am going to be offering this as one of my Christmas cards in my Christmas card class. I also just love that new stamp Hand Penned Holidays that I used for the sentiment.


Thanks for peeking in today.


Have a wonderful day.

Saturday, August 13, 2011

I love the Hello Doily stamp....

I just love this Hello Doily stamp. Look at how real that doily looks on this card. It's awesome. This card is a case from a card I saw on Stampin Connection made by Brenda Keenan. I loved it so much I had to try to make one myself. It uses the technique of emboss resist. I am going to teach this technique to my club ladies on Thursday night and we will be making this card. I used the colors Crumb Cake and Baja Breeze for this card.
I don't really have many Thinking of You cards, so that's why I used that sentiment this time. Plus, I just got that stamp set Sincere Salutations so I wanted to use it. What took me so long to get that stamp set????
Anyway, have a wonderful day.
Thanks for peeking in today.

Friday, August 12, 2011

I have the best BFFICM!!!!

So, if you come to my blog often you know I went to Convention. Well, I have the Best Friend Forever that I went with. Thus the BFF, the ICM stands for the city she lives in. I will keep that between us.....hahahaha Anyway, while we were at Convention we were looking at the sample boards and taking pictures, and she saw a card very similar to this one. When she saw it, she told me that I needed to make her that card. I laughed and said sure. Well, for my birthday a few weeks ago, she took me to lunch at Benihana's and then gave me a wonderful present. I knew immediately the card I would make her as a thank you.....yep....this card. It is pretty cute I must say. How cute is that lamp shade? I just used the cupcake builder punch and turned it upside down. The lamp stand itself comes from the Aviary stamp set, and then I added some bling to the lamp shade with some pearls.
That is honestly one of the best things about being a Stampin Up demonstrator is the friends you make. I would never have meet Chris if it wasn't for Stampin Up. She is truly a wonderful person, and I feel so blessed to have her as such a dear friend. I will NEVER attend a Convention without her!!!

Thanks for peeking in today.

Have a wonderful day.

Thursday, August 11, 2011

Where have I been????

I canNOT believe that it has been almost 2 weeks since I last posted. Time sure does fly. Heck, summer is almost over and that means heading back to work for me.....booo! Don't get me wrong, I'm grateful to have a job, but just enjoy being home much more.

With that said, I have been busy making these cute little owls for my daughters baby shower coming up here pretty soon. We are going to fill them up with some M&M's and give them out as party favors. As you can see, there are 30 of them total. They were so easy to make, just time consuming. I'm glad I had the foresight to start early, because I tend to wait until the last minute and then I'm stressing out and panicking.....I hate it when I do that.
To make this cute little guy I used:
The pillow box in soft suede for the body.
The 1 1/4" circle punch in white, the 3/4" circle punch in pool party and the 1/2" circle punch in black for the eyes.
The littlest heart on the heart to heart punch in calypso coral for the beak.
I used the small heart punch in poppy parade for the heart.
I used some retired paper woodland something or other, sorry, for the scallops on the front. I cut them out using the wonderful Tastefull Trim die for the Big Shot.
His feet were punched out with the 5 petal flower punch and I just cut off the other 3 petals.
For his wings I used some chocolate chip cs and the large oval punch.

Thanks for peeking in today.
I hope it's not another 2 weeks before I post something. hahahaha
Actually I do have some fun things I have also been working on I will share tomorrow.

Have a wonderful day.