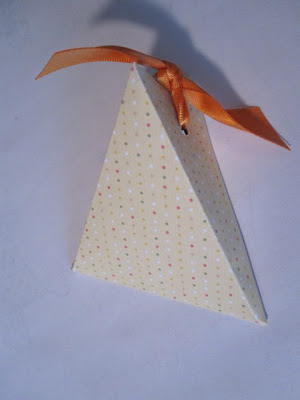
I know I promised earlier this week that I would post the directions on how to make this super cute, super simple triangle box....Sorry it has taken me so long. I have had the pleasure of having strep throat this week....I know you're jealous, but maybe next time it can be you. ; )
Anyway, onto the super easy directions. I sure do hope I explain this where you can understand easily.
First off, take a pice of 3x6 piece of Designer Series Paper and score it at 3".  Then fold it in half, and mark with a pencil at the top, the middle. It is very important that this mark is made at the TOP.
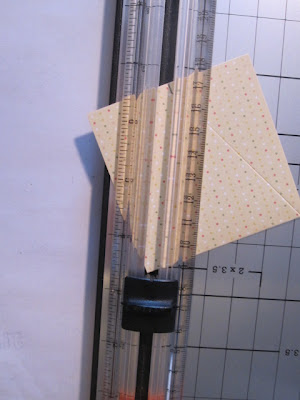
 Get your cutter/scorer and make sure you are using the black score blade....I accidently cut one once because I wasn't paying attention....and put the marked spot at one point on the scoring/cutting line and one of the corners of the bottom on the other end of the scoring/cutting line....and score it.
 Then flip it around, and do the same thing to the other corner and the marked piece. I sure hope I explained that well. It makes sense to me. (big grin)
 Now fold in the four scored sides. It should start looking like this.
 When all four sides are folded in, it will look like this.
 Take your crop-a-dile and punch a hole on each side for the ribbon to go through.
 This picture is awkward....but I wanted you to see...heck I don't even know what I wanted you to see....just go to the next picture...hahahaha
 This is what it looks like with all four sides punched with holes.
 Then fold it in half, and mark with a pencil at the top, the middle. It is very important that this mark is made at the TOP.
 Get your cutter/scorer and make sure you are using the black score blade....I accidently cut one once because I wasn't paying attention....and put the marked spot at one point on the scoring/cutting line and one of the corners of the bottom on the other end of the scoring/cutting line....and score it.
 Then flip it around, and do the same thing to the other corner and the marked piece. I sure hope I explained that well. It makes sense to me. (big grin)
 Now fold in the four scored sides. It should start looking like this.
 When all four sides are folded in, it will look like this.
 Take your crop-a-dile and punch a hole on each side for the ribbon to go through.
 This picture is awkward....but I wanted you to see...heck I don't even know what I wanted you to see....just go to the next picture...hahahaha
 This is what it looks like with all four sides punched with holes.


This is really cute! I will have to try making some of these. They look really fun!
ReplyDelete