Monday, January 31, 2011

Fun with flowers card

The other night at club we played with this Pawsitivily Prints paper and I just love how "happy" the paper seems. It just says "happy" to me. Anyway, I wanted to make a card with it, and to me happy is also flowers. So, I saw a card similar to this once and thought it would be the perfect card to make. I made 2 and turned one on it's side for fun.
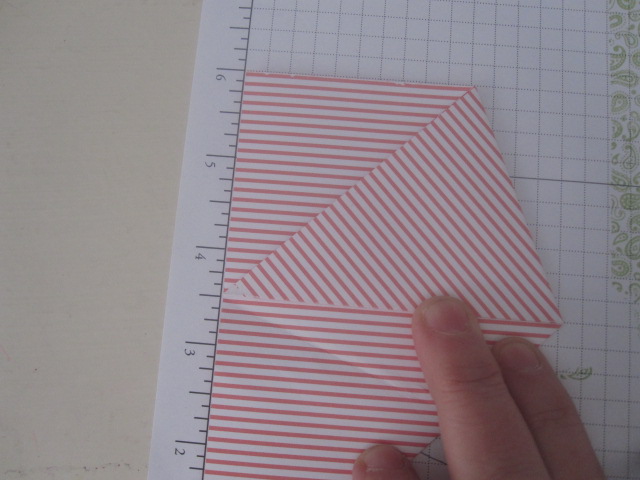
To make the flowers you just punch out 3 flowers and squirt them with some water and scrunch them up. Below is one flower wet and scrunched, and the other one dry.
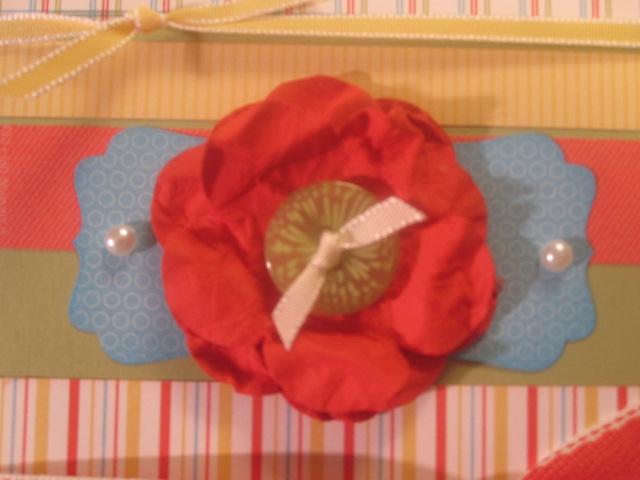
You let them dry a little and then layer them for your flower. I used a button with some 1/8" satin ribbon through the holes of the button for an embellishment. To adhere the flower I used Crystal Effects, but you could use a glue dot or stampin dimensional.
Underneath the flower, I punched out some DSP from the Decorative Punch label and then cut the label in half. I also sponged some Tempting Turquoise around the edges too.
No sentiment on the outside of this card. That makes it nice when I go to give the card, I can add the sentiment inside.

Thanks for peeking in today.

Have a wonderful day.

Diaper fold pouch

When I put together the order for the fabulous ladies in my club, I like to add a little thank you for their order. What better way to say thank you, than candy. It's usually chocolate, but this time it's sweetart candies this month.
I thought it would be fun to put their candy in this cute little diaper fold pouch. I even threw in the tutorial on how I made them.
I took one of the 6x6 In Color papers from the free package from the Hostess Level 1, then folded in half the diagonal way.....like below.
Next, you take the right pointed side and bring it over to the left side at about the 3 1/2" mark.
This is just an approximate mark. Yours may vary, some of mine did....I made 8 total.
Then, I took the left pointed side and brought it over to the right side and folded.
It should now look like this. I haven't used any adhesive for this pouch, just folds.
Now you're going to take one of the top points and fold it down over the previous folds.
Does your's look like this? It should.
That's it. Easy peasy huh?
I just gave my pouch a little squeeze to make it puff out a little.
Now you just decorate the front to your desire, and fill it with some goodies.
Now go make some of your own.
Thanks for peeking in today.
Have a good day.

Saturday, January 29, 2011

I love you banner tutorial.....finally!!!

Remember way back when, when I posted this Valentine's banner and said if anyone wanted directions to let me know.....well...I finally got it up. I'm sorry it took so long. I really do need to learn how to balance my time better. I got a new ipad for Christmas and that thing just keeps me preoccupied, when I should be "working"....hahahaha So here we go:
First of all: Cut 2 pieces of cardstock 3 1/2" x 8 1/2" and score every 2 inches. You should have a 1" piece left over. You will use that to secure it to the other piece of cardstock to make a long strip of paper. On the other piece of cardstock, just cut that 1" piece off. Here is your cardstock, scored, folded and glued together.
Next to figure out where to cut the corner pieces, I measured the first 2" piece and you can see I made a little mark at 5/8" and then again at 1 3/8".
Next, I put the ruler along the side edge and measured down 1" from the top and made another mark.
And then again, I made a mark 1" down next to the first folded edge.
Now take your ruler and mark the line from the top to the edges. This is where you will make your cuts.
After you cut, it should now look like this. You will have a little flap. Leave it there.
Now take your little flap and just fold it over to the next 2" folded section, and that is your guide to where you need to cut.
You should now look like this.
You should have 3 edges cut at this point. Next, you will just fold over the first completely cut 2" section, and that will now be your guide for the next cut you need to make.
Now, take your little flap again, and use it as your guide for the next cut....as so on.
When you are all done, you should look like this.
To decorate the front, I just took some DSP and cut it to 1 3/4" x 3 1/4". I then layed it over the top of the cut cardstock to get an idea where I need to cut the DSP.
I flipped it over and made a mark with my pencil on the back where the cardstock was. It should look like this.
Then, I just cut in 1/4" from that drawn line. I freehanded my cut, but if you feel more comfortable measuring it, then do so.
Then you apply all your DSP to your cardstock and decorate however your little heart desires. They really are easy to make and addicitng.
Have fun making yours now. And again, I'm so sorry it took so long to get this up on my blog. If I failed to leave something out. Let me know and I will PROMPTLY....hahahaha....fix the problem.
Thanks for peeking in today.
Have a wonderful day.

Valentine Defined

I had club last night and had made some of these cards for a doorprize.
It really is a cute card so I made some more today, and thought I would post it today.
I really do love that Valentine Defined stamp set. I inked up this cute tree with some Pear Pizzaz and Soft Suede and then punched some cute little hearts.
The base of the card is Pink Piourette with some Rose Red ran through the Big Shot with the Polka Dot embossing folder.
I'm not really sure if I like the pearls or not. The jury's still out on that one. Thanks for peeking in and have a great day.

Friday, January 28, 2011

Greeting Card Kids

I think this little girl is just so stinkin cute. I have been wanting to play and color her up for some time now. I finally did today.
Isn't she just so cute? This is not your typical sized card. I made this one a 4 1/4" x 4 1/4" card. Afterwards, I wished I had made it the full normal size. I colored her in by using the Blender Pens and the ink on the top of the ink pad. I colored her dress in with Baja Breeze and then used Baja Breeze cardstock and DSP to finish off the card.
I had to give the inside the love it deserves too.
When I colored her in.....I colored in a total of 8 little girls at the same time. So, be looking out for more of this little cutie her on the blog.
The possibilities are endless with her and her cuteness.
Thanks for peeking in.
Have a great day.

Monday, January 24, 2011

An Easel Calendar

I bought this great calendar from Angie Juda a while back and have been wanting to make one of these ever since. This is what I had in mind when I ordered it too.

I used the whole easel card concept, just didn't make it into a card. I also wanted to use some of Stampin Up's corkboard on the bottom. This will be so cute sitting on my desk.....that is after I clean it all off....if that ever happens... ; ) Here is the side view.

I wasn't sure what to do on the top and thought a butterfly explosion would work since the DSP had flowers on it. It's okay.

And here is a close up of the little corkboard bottom.

This was soooooo easy to make, and would make a great gift too.

If you want to order your own calendar click here.


Thanks for peeking in today.

Have a great day.

Sunday, January 23, 2011

Can you believe it???

Can you believe it??? I finally got into my craft room last night and got some things done.
I wanted to make some note cards for doorprizes for my club this Thursday night. These little creations are what I came up with. I wanted to keep them simple, so they could quickly, and easily be recreated. I used 4 of the 5 In Colors for these, since I wanted to make 2 packs of 4 notecards for the doorprize.
So what do you think? This one is in Concord Crush, with one of the styles of flowers I made.This one is in Poppy Parade with the other style of flower I made.
I really like the way they turned out and I hope the winner of the pack of cards does too. ; )
To make the flowers, I stamped En Francis background stamp in all four In Colors on Whisper White cardstock. I then ran them through the Big Shot with the new Fun Flowers die from the new Occasions mini catalog. I then punched out from the cardstock from the In Colors either a flower or a 2 1/2" scallop circle. I sprayed them water and crunched them up twice, just to get lots of wrinkles. I added either a white or a silver Jumbo Brad and stuck them on with Crystal Effects. Cute huh???
I used the free DSP from the Hostess Level 1 set for the bottom of the card, and a scallop from the Tasteful Trim die. I love that die!!! I wanted to keep the sentiment simple, so I used one from the A Word for You stamp set.
Here they are in all the four colors.
Thanks for peeking in and coming back even though I haven't posted in forever.
Make it a great day today.

Tuesday, January 18, 2011

Distractions.....

I don't normally post family pictures on here.......BUT......I wanted you to see why I have been so distracted from getting blog posts up lately.
Can you blame me??? I mean when those little ones are over to play at Grandma's house, I can't refuse all their loving and kisses. Who wants to play with paper when you can get wet, sweet, slobbery kisses from little sweet faces like these???? Now that the long weekend is over and they have gone back home, I will get back to things at hand.
Thanks for hanging in there and coming back.
See you soon.

Saturday, January 15, 2011

Wow, what happened????

Wow, what happened???? I was so good at posting things everyday and then BAM!!! I know I promised a tutorial of how to do those I LOVE YOU banners, and I am working on it I promise.

Sometimes life just gets in the way of having paper time. Be patient.....it's coming.....hopefully later today.

Tuesday, January 11, 2011

Happy Birthday Lora

Today is my sister's 40th birthday. Wow, what happened to that little sister I used to tease, and that drove me crazy all the time????
Time flies when you're having fun they say, but this is ridiculous....
And it falls on 1-11-11. So, today at 11:11a.m. I'm going to text her Happy Birthday. Silly huh???
So I saw this adorable card on Stampin Connection, I'm telling ya....that place is wonderful for ideas, but you have to be a Stampin Up demonstrator to get in there, I'm horrible at remembering whose original card it was, so if it was you....step forward and claim your prize.
I thought this would be a perfect card and saying for my sister. And just as I was adding the glitter to the flames of the candles, I remembered that my sister hates glitter. What?!?!? who hates glitter... Aren't they cute in glitter??? I have to share a little secret about these cute little flames. They are punched using the new Blossoms Petal Punch. It was meant to be a leaf, but someone....not me....thought out of the box and saw a perfect shaped candle flame. Neat huh??
So, I lovingly made my sister another card just like the glittery one, but with no glitter this time. How can we be sisters???? I just don't get it....hahahaha I love bling!!!
This card was so easy to make and I thought it was pretty cute, I mean after all I did steal the whole concept of the card from someone else.....{{{big cheesy grin here}}}
Thanks for peeking in today.
Tomorrow I will have a full tutorial on how I made the I Love You banner. Thank you to those of you who have requested the directions. So be looking for that tomorrow.
Have a great day today.

Monday, January 10, 2011

L-O-V-E is in the air....

I have had this frame just sitting around for some time now. I decided it needed to be put to use. Since it's almost Valentine's Day I decided it would be fun to make something to decorate the house for Valentine's Day.
This is what emerged. You can't tell very well, but I used the new Glitter paper from the Occasions Mini Catalog for the letters. I used some big letters for my big shot that are not Stampin Up, but knew they would be perfect for this project.
I had to use the new trinket keys with the new You're a Gem stamp set for this. For the hearts I just randomly placed on the "L" and "O" I stamped them with the versamark ink, used some heat and stick powder with my heat tool, then added some red glitter and heat set it. It looks so good with the glitter paper.
I didn't get the best pictures for this, but we are a bit cloudy around here today, and the sun wasn't out to help. Hopefully you can get a good idea of how cute it really is in real life.

I couldn't decided if I wanted to add 4ever to the bottom heart on the outside, or it's the little things. I went with it's the little things, because many times the little things become big things.
Thanks for peeking in today.
We have so many birthdays this month, so I will be in my craft room today making lots of cards for those blessed occasions. So, be looking for those here soon.
Have a wonderful day today, even if it is Monday. ; )