Tuesday, September 27, 2011

We have a baby.....

Well in my last post I mentioned that I had done accupressure on my daughter to induce labor. Well, it must have worked because at 5:30 p.m. (2 hours after doing pressure points) she asks me what it's like when your water breaks. Sure enough, her water had broken. So, we headed to the hospital. Little Brayden was born a few short hours later. He arrived here on Earth at 12:52a.m. Monday morning. He was a big boy weighing in at 9 lbs and 9 ozs and 21 inches long.

As you can see he is adorable and I'm not proud at all.....NOT.

This is one of my favorite photos so far.

When we brought him home today, he was introduced to the family dogs. As you can see, Daisy was in love from the start. She really does LOVE Brayden.

I can't wait to finish the photo album I posted earlier. First I need to get some sleep. I think I've slept a total of 5 hours in the past 3 days. I got the privelege of staying in the hospital with my daughter while she was there. The guests bed was a very uncomfortable couch.....and I use the term couch loosely....that isn't even wide enough to lay on your back comfortably. But it was worth it to be there. I can't wait to crawl into my own bed tonight and get rested. My plans tomorrow are loving on that little boy. I can't get enough kisses on those cheeks of his.


Thanks for peeking in.

Sunday, September 25, 2011

Grandma brag booksl....

So, if you've read my blog at all lately, you know I'm waiting to be a grandma again.

So, while I was waiting yesterday I decided to make a cute little brag book to put pictures in to take to work and show the little guy off.

About 18 months ago I made this cute little brag book for my granddaughter Lucy when she was born. I decided I really liked the size and the amount of pictures that it held, so I made one with the same pattern for little Brayden.

This was little Lucy and the front of the brag book. Then when you open it up, it holds a few pictures on each side......but.....
As you can kind of see here, it has two pull out pages on each side to hold even more pictures.

That's what it looks like with the all the cute pictures in it. Well, since I don't have any baby pictures yet to put in it. Here is what it looks like while we wait.

I have to say that I didn't use stampin up dsp on this one. I did use Pool Party and Cherry Cobbler cardstock, but the DSP was from My Mind's Eye. My daughter wanted a more manly man type of scrapbook, and Stampin Up's baby paper isn't really manly man, it's more cutesy. Which is good too.

Anyway, this is the front of the scrapbook.

And this is the inside without any pictures and with the 4 pull out pages .

I will take pictures of it and show you when it's full of pictures of the cute little guy when he finally gets here.

It was so much easier to make the second time around. The first one I made seemed to take forever, because I didn't understand the directions all that well. When I finally figured it out, the directions made perfect sense. But, since I'd already made one, this made up in like an hour.
I got the directions from Lynn Pratt's blog Stamp n design. There is a link on my sidebar if you are interested. I think the tutorial cost $5.99, but I'm getting my money's worth.


My daughter has a doctor's appointment tomorrow and the doctor said if she hasn't had it yet, she will induce her if she wants. They are concerned because he is so big. So, if she hasn't gone into labor by tomorrow morning, I think she's going to take the doctor up on the inducement.

We have been doing accupunture points for inducing, and grandma's had a little chat with him, my son even went out and bought castor oil. We don't want her to do the castor oil because we have heard too many horror stories about how it was bad for the baby. She will just wait it out instead. So, hopefully next blog post has baby pictures in it.....hahahahaha


Thanks for peeking in today.

Thursday, September 22, 2011

Club order thank yous

This is one of the cute little projects we made at my upline meeting on Saturday. I thought they were so cute and perfect for a Halloween treat. Our original was a Christmas one, but I changed it for my club girls. They were so easy and quick to make up too.


I made a total of 8 the other night.
Here is the Christmas one we made on Saturday.

It's pretty cute isn't it??

Inside hides a yummy little treat. I used Mr. Goodbars, but at out upline meeting we used Kit Kats. What yummy treat would you put in yours????


I hope my ladies like these little treats, and know how much I appreciate them and their business. I really do love being a Stampin Up demonstrator. I love playing with paper, and I love sharing it with others.


Thanks for peeking in today.

Tuesday, September 20, 2011

A BIGGER candy wrapper treat....

I can't believe that I am still sharing fun things we learned at Convention. That's how much they pack into our convention experience. I can't remember who demonstrated this cute little....well, actually it's not little it's "bigger".....candy wrapper. Yep, it fits a king size candy bar inside there. Cool huh??


Are you wondering how I did that? It's sooooo easy actually. Instead of just a flat piece of 5 1/2" x 6 1/2" cardstock or DSP, you will need the normal width of 6 1/2" but you will need a longer piece for the length. So make your paper 6 1/2" x 9 1/2". On the 9 1/2" side, you will need to score your paper at 3 3/8" and 5 3/8". Fold your paper in on the scored lines. NOTE: Fold one in, and then the other will fold out. This will fit the candy wrapper die, then roll it through your Big Shot . When you open up the paper it will be the length you need to fit a king size candy bar. You just assemble it like you would the smaller version. As you can see in the middle, I just made a belly band to go around it so it would hide the score marks.


If this was confusing and you need a picture tutorial, just leave me a comment and I will "show" you how to do it.


I gave this as one of the door prizes at our last club night. It was a hit.


Thanks for peeking in today.

Monday, September 19, 2011

Cute little purse tutorial

Remember this cute little purse that I showed earlier? I said if you wanted to learn how to make it to let me know. Well, I got enough requests that I made a photo tutorial. I will forwarn you that the pictures aren't the best, but hopefully it will help you see how to make one of these cute little purses. It starts with a 12 x 12 piece of cardstock. Score it at 4" and 8". Turn it and score it again at 4" and 8". You will now have 9 4" squares scored on your paper.
You will need to cut off the 4 corners. To do this I lined my scored lines along my paper cutting edge and then cut.

Hopefully you can tell from this picture what it looks like AFTER I made the cut.

So, now I have all 4 corners trimmed off. On the sides where you trimmed your corners off, you will now need to make a score line in the middle of that space. I hope I'm not confusing when I explain this. In the photo below I have my ruler layed out acorss the middle of the cardstock. If you look closely you will see that two of the scored intersections are lined up with my ruler.

Now take your stylus and run it from the intersection to the end of the paper like below.

Below is a picture of the finished scored line. Right in the middle of that section. You do that for all 4 of the corners that were trimmed.
Now on the four full squares left, you are going to find the middle (which would be 2") If you look real close, you can see I made a little mark at the middle point.

Now from the mark, go up to the corner intersection and score.

Now, do the other side. From the mark, go up to the other intersection and score.

Now do that to the OPPOSITE square as well. These will be your sides. Your paper should look like this now. NOTE: when you are making these score lines, make sure they are exact. If not, your purse won't fold up correctly.

You now need to cut your DSP to decorate the middle. You will need 5 pieces cut at 3 7/8" square. 3 of those will get adhered to the 3 squares in the middle. The 2 remaining squares need to be cut. To do this, I folded it slightly in the middle and made a little mark. If you look closely you can see my mark at the bottom of my DSP.


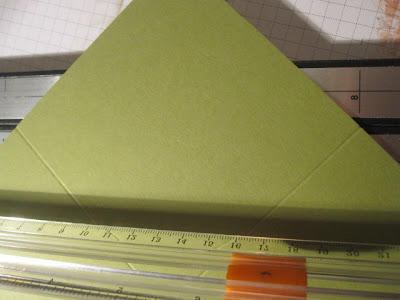
Now I lined up my mark and one of the corners on my paper cutter, and cut.

Then I flipped it around, and lined up the other corner with the mark and cut it also.

Now you should have a triangle. Do this to both pieces and adhere to the inside triangles of your purse.

Your purse should be looking like this by now.
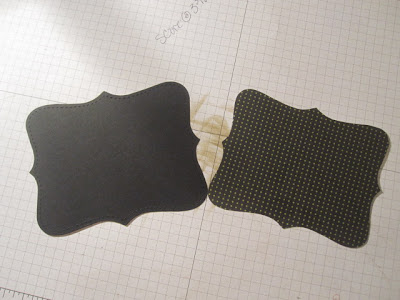
Now you will need to make the embellishments for the outside. You will need a top note die from cardstock and one from DSP. Trim the DSP on the perforated edge and adhere to the cardstock top not die.

It should now look like this.

Fold this in half the longway.

With your crop a dile, go in as far as you can and punch a hole with the largest hole punch. Do this on both sides.


Take about 9-10 inches of ribbon and pull through the holes like the picture below. Make sure your ribbon isn't twisted, so you have a nice smooth handle. I layed down 3 rows of sticky strip to adhere my ribbon too, because this is also going to hold the pure together so it needs to be secure.


Attach this to the back of your purse with the ribbon being hid by the purse itself. Then I added a piece of velcro to the front of the top note and then shut the purse and it attached the velcro perfectly aligned.


Decorate the front however you like, and you have yourself a cute little purse to hold some yummy treats.

I hope this tutorial was helpful and not confusing. Feel free to leave a comment and let me know if it helped or I needed to clarify anything.


Thanks for peeking in today. I am waiting for my 6th grandbaby to be born here anytime now. Hopefully soon. I will have to interupt this "craft" blog for some "grandma" pictures when it happens.....hahahahahaha


Thanks for peeking in.


Sunday, September 18, 2011

Our fun Upline meeting ....

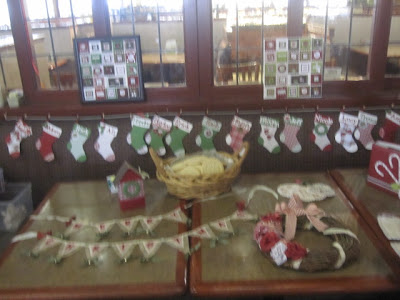
Every few months my upline, Lis Ljung, has a meeting for all of her downline. Yesterday was one of those fun meetings. Here is a picture of Lis explaining to us some of the make n takes that we got to make. Here is a very bad picture of the display that Chris and I put together for the Christmas items. It really looked good in real life.
This is a picture of the doorprize that I got to take home. It is a plastic picture frame with some DSP in it with a 3 x 3 notepad covered. Too cute.

Here is a picture of one of the make n takes that we made. It is a tier card with 3 circles that go together and then when you hold it up it falls down as 3 circles. It is really cute. This is a horrible picture of it. I was in too big of a hurry to take the pictures because my battery was on low. That will teach me to keep my battery charged.

This is me and Gloria, my BFF's downline. We were looking at the idea boards together and I was taking pictures of the boards and turned the camera on us and got a picture. She's a sweetheart. I have to say that one of the perks of being a demonstrator is all the fun new friends you make.Gloria was helping Eileen finish up her swaps.


Here is my upline Eva Kailiponi. Another great friendship made because of Stampin Up.

Here is a picture of all the swaps that were made. We lay them out on a table, and then vote on the ones that we like best. We vote for 3, and the top 4 win prizes.....woo hoo....I won #2. Picture coming.....

Here is Rachel. She was showing everyone how much fun it is to make those lollie wreaths that I posted earlier.

Here is Sandy Hancock, she is Lis' upline. She has been with Stampin Up for 22 years. She was giving us a pep talk on trying to earn the Fiji trip next year. If you hit a certain quota, Stampin Up gives their demonstrators a wonderful trip. Next year is is Fiji. WOW!!!!

Here she is showing a cute little gift that she made for Lis.

And here are the 4 winners holding their cards. In first place was Krista with an amazing card, then I'm in second place, and then Nadine in 3rd place, and my BFF Chris in 4th with her cute Christmas card.

I'm sorry these pictures don't give the day justice. One of these days, I'm going to invest in a better camera.


Thanks for peeking in.

Have a wonderful day.