Remember way back when, when I posted this Valentine's banner and said if anyone wanted directions to let me know.....well...I finally got it up. I'm sorry it took so long. I really do need to learn how to balance my time better. I got a new ipad for Christmas and that thing just keeps me preoccupied, when I should be "working"....hahahaha So here we go:
 So here we go:
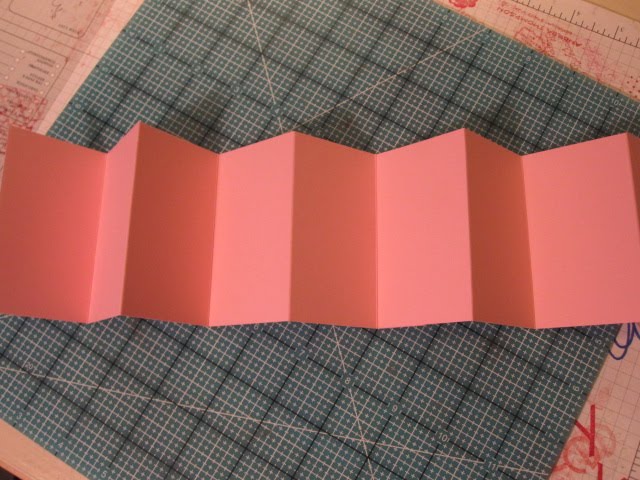
First of all: Cut 2 pieces of cardstock 3 1/2" x 8 1/2" and score every 2 inches. You should have a 1" piece left over. You will use that to secure it to the other piece of cardstock to make a long strip of paper. On the other piece of cardstock, just cut that 1" piece off. Here is your cardstock, scored, folded and glued together.
 Next to figure out where to cut the corner pieces, I measured the first 2" piece and you can see I made a little mark at 5/8" and then again at 1 3/8".
 Next, I put the ruler along the side edge and measured down 1" from the top and made another mark.
 And then again, I made a mark 1" down next to the first folded edge.
 Now take your ruler and mark the line from the top to the edges. This is where you will make your cuts.
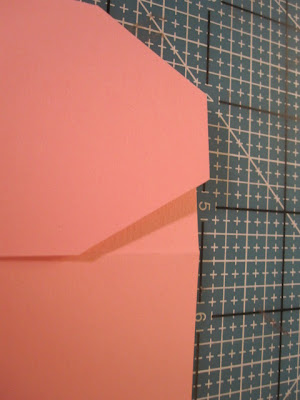
 After you cut, it should now look like this. You will have a little flap. Leave it there.
 Now take your little flap and just fold it over to the next 2" folded section, and that is your guide to where you need to cut.
 You should now look like this.
 You should have 3 edges cut at this point. Next, you will just fold over the first completely cut 2" section, and that will now be your guide for the next cut you need to make.
 Now, take your little flap again, and use it as your guide for the next cut....as so on.
 When you are all done, you should look like this.
 To decorate the front, I just took some DSP and cut it to 1 3/4" x 3 1/4". I then layed it over the top of the cut cardstock to get an idea where I need to cut the DSP.
 I flipped it over and made a mark with my pencil on the back where the cardstock was. It should look like this.
 Then, I just cut in 1/4" from that drawn line. I freehanded my cut, but if you feel more comfortable measuring it, then do so.
 Then you apply all your DSP to your cardstock and decorate however your little heart desires. They really are easy to make and addicitng.
  Have fun making yours now. And again, I'm so sorry it took so long to get this up on my blog. If I failed to leave something out. Let me know and I will PROMPTLY....hahahaha....fix the problem.
 Next to figure out where to cut the corner pieces, I measured the first 2" piece and you can see I made a little mark at 5/8" and then again at 1 3/8".
 Next, I put the ruler along the side edge and measured down 1" from the top and made another mark.
 And then again, I made a mark 1" down next to the first folded edge.
 Now take your ruler and mark the line from the top to the edges. This is where you will make your cuts.
 After you cut, it should now look like this. You will have a little flap. Leave it there.
 Now take your little flap and just fold it over to the next 2" folded section, and that is your guide to where you need to cut.
  You should now look like this.
 You should have 3 edges cut at this point. Next, you will just fold over the first completely cut 2" section, and that will now be your guide for the next cut you need to make.
 Now, take your little flap again, and use it as your guide for the next cut....as so on.
 When you are all done, you should look like this.
 To decorate the front, I just took some DSP and cut it to 1 3/4" x 3 1/4". I then layed it over the top of the cut cardstock to get an idea where I need to cut the DSP.
 I flipped it over and made a mark with my pencil on the back where the cardstock was. It should look like this.
 Then, I just cut in 1/4" from that drawn line. I freehanded my cut, but if you feel more comfortable measuring it, then do so.
 Then you apply all your DSP to your cardstock and decorate however your little heart desires. They really are easy to make and addicitng.
  Have fun making yours now. And again, I'm so sorry it took so long to get this up on my blog. If I failed to leave something out. Let me know and I will PROMPTLY....hahahaha....fix the problem.
Thanks for peeking in today.
Have a wonderful day.
No comments:
Post a Comment