Thursday, March 24, 2011

Sweet, sweet butterflies

I have been seeing lots of these cuties out there in blogosphere, and thought I would give one a shot. I just love how little and sweet they are. They fit inside a 3x3 envelope and are so cute. I know there are tutorials out there somewhere, but I just tried it on my own. I think it turned out pretty cute actually. I gave it to a friend who just had a baby girl. It's the perfect size for tucking inside a gift.


Thanks for peeking in today....It's Friday woo hoo!!!


Have a great weekend my blogging friends.

It's the little things....

Sometimes the little things are really important.....like reading the directions!!! hahahaha
I made this card for the Stamping 411 challenge this week, BUT didn't read that the linky closes at 8p.m. Thursday night. I felt like making a card last night while watching Survivor, so I thought I would do one of the challenges. The stamping 411 challenge looked fun, so I made my card....just not in time...no biggie. I'm still happy with my card. Challenges are fun to tackle. They help me to reach outside of my comfort zone and think for myself, instead of copying someone else....hahahaha Which is good for me actually.
I even gave the inside some attention.

Thanks for peeking in today.
It's cold and wet here in my world, but I love it.
Have a wonderful day today.

Tuesday, March 22, 2011

Homemade and to die for....

Homemade and to die for is right!!!!! I found this A-M-A-Z-I-N-G banana bread recipe and can't make it fast enough to share with people....yes, it's that good.
So, I made some more last night and packaged them up all cute, and took them to church on Sunday. Gave them the bread and the recipe and I was so glad that I had that perfect stamp for my packaging. Not only was it delicious, but it was cute too. There were more than these, but you get the idea.
So, I thought it would be really rude not to share the recipe with everyone else too.

Here it is:

Banana Bread Recipe

Ingredients:
  • 1/2 cup butter, melted
  • 1 cup white sugar
  • 2 eggs
  • 1 teaspoon vanilla extract
  • 1 1/2 cups all=purpose flour
  • 1 teaspoon baking soda
  • 1/2 teaspoon salt
  • pinch of cinnamon
  • 1/2 cup sour cream
  • 1/2 chopped walnuts
  • 3 medium overripe bananas, sliced

Directions:

  1. Preheat oven to 350 degrees F. Grease a 9 x 5 inch loaf pan....I like to make them into muffins too. So whatever pan you like to use.
  2. In a large bowl, stir together the melted butter and sugar. Add the eggs and vanilla, mix well. Combine the flour, baking soda, cinnamon and salt. Stir into the butter mixture until smooth. Finally, fold in the sour cream, walnuts and bananas. Spread evenly into the prepared pan.
  3. Bake at 350 degree oven for 60 minutes, or however long for the pan you use. Cool loaf in the pan for 10 minutes before removing to a wire rack to cool completely.

I don't usually put recipes on my blog, but this one was worth the exception.

Enjoy! Now go make some yumminess for yourself. I'm sure there are no calories in it....hahahaha

Thanks for peeking in today.

Have a great day.

Monday, March 21, 2011

Sending Springtime Smiles

I finally busted out my Easter Blooms stamp set. I saw a cute card made with it kinda like this one, and it just inspired me to go make one for myself. This card also uses DSP, and a stamp set that will be in the 2011 catalog. We as demonstrators got to order it early, and you can too in April. The cute little decorative label stamp is the new stamp set called Four Frames. I don't know if you can see it very well, but there is a scallop of DSP in there and it uses the new DSP. I usually give my customers a little 3-D project with candy in it with their orders as a thank you. But, this month I gave it to them at club night. So, I thought I would include a hand stamped card from me instead this month. This card had a lot of work involved to have to whip out 8....what was I thinking????? hahahaha
I hope they like it. I used Regal Rose, Pear Pizzazz, and Daffodil Delight for my colors.

Thanks for peeking in.

Have a great day.

Sunday, March 20, 2011

I'm so proud....

Silly title huh? But, I have to say I am really proud of myself, because I not only designed these cute little cards myself. I also figured out the dimensions of the box and made the box without a tutorial. Now I know for some of you that is no big deal, BUT for me it's exciting. So, if I can do it.....so can you people.
This was the door prize for club on Thursday night.
Here you can see the box with the four cards and envelopes that get tucked inside.


This isn't the best picture, but you can see the little butterfly stamped inside.
I think this is a great little gift idea. I think I will be making a few more of these up to have on hand. I used the Bold Blossom stamp set and the Pawsitively Prints II DSP.
Thanks for peeking in today.
Have a great day.

Saturday, March 19, 2011

Springtime Roses

At club Thursday night I taught the girls how to make these pretty roses.
After all, it's springtime....well, almost. Of course, you wouldn't know it looking out my window today. It's overcast and cold.
I made a few before hand and put them on different things to show all the different ways you can use your beautiful roses.
Here it is on the Bitty Box in Blushing Bride.
Another one in Poppy Parade on a tag. (See my cute toes on the bottom? Hahaha I just noticed that as I'm typing....oops)
And this one is my favorite.
This one is in Concord Crush, and as you can obviously see, I put this one on a card.
This card would have to be hand delivered, but I think it is worth it.
If you want to make one of these roses, you can find the tutorial I used here.
Thanks for peeking in today.
Have a wonderful weekend. I know I sure will.

Sunday, March 13, 2011

A cute Easter bum...

This naughty little bunny is trying to hop off with a carrot he has stolen from the garden, but isn't that the cutest little bunny bum you've ever seen? I saw a card like this last year, and they didn't have a watermark on their picture that I printed, so I couldn't tell you who it was. If it was you, please claim the accolades that you so justly deserve. In fact, I bought the trendy trees stamp set just so I could make this card. Yep, those cute little carrots are the trendy trees stamp set.
If you would like to make a cute little bunny bum too, these are the punches that I used.
1 3/4" x 7/8" oval punch for the ears and the feet
1 3/8" x 5/8" oval punch for the pink part of the foot
cupcake punch, for the toes. I used the confetti circles.
1 3/4" circle punch for the body
1 1/4" circle punch for the head
Itty Bitty Shapes circle for the tail

Thanks for peeking in.
Have a great day.

Saturday, March 12, 2011

Happy St. Patrick's Day

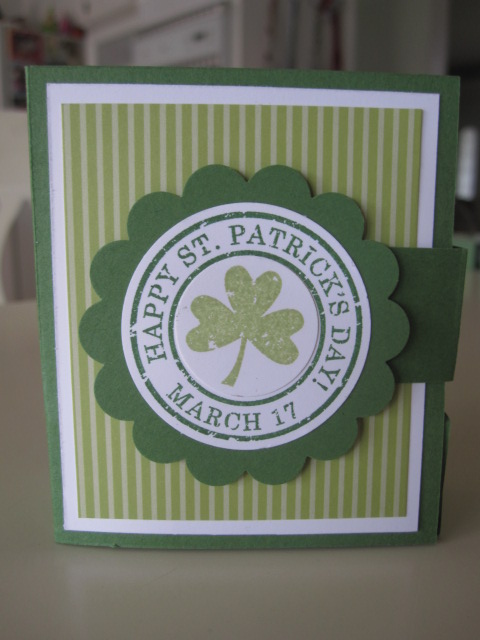
This month I wanted to make some more of those cute hand sanitizers from Bath and Body Works, but I wanted them to open from the side, not the top like I've previously made from a wonderful tutorial from Erica Cerwin.
So, I sat down and did a little math.....not my favorite part of crafting...hahahaha...and I came up with a new pattern to open from the side. I was so proud of myself, that I figured it out on my own and didn't copy someone else.....which is what I do best....hehehehe
And here is what I came up with.Here it is opened up. I still need to decorate the inside a little, but I was so excited to share it. I'll do the inside later.
You can see here that I popped up the scallop with dimensionals so that the flap I adhered can be tucked behind it to keep it closed.
Okay be nice to me here.....this is a very rough draft of my dimensions. Also, keep in mind that I am not computer literate in many ways. I don't know how to throw in all kinds of arrows and whatnot on my pictures. I can, however, take a picture and post it, and that makes me happy enough....lol
Hopefully this will help explain the dimensions I used and how to make it. The bold lines are cut lines, and the dotted lines are score lines. It starts with a 8 1/2" x 6 3/4" piece of cardstock.
If this makes no sense, and you need more directions, you can leave a comment or email me directly and I will try my best to help more.
Thanks for peeking in.
Have a great day.


Wednesday, March 9, 2011

More Bliss

Another card made using the Bliss stamp set and yes.....another case from another talented Stampin Up demonstrator.....yep....Dawn Olfcheske.
I loved everything about this card. Which I think is funny, because Bliss is the one stamp set in the Sale-a-bration catalog I didn't really think I wanted.....crazy huh?
Well, as you can see, I caved in and got it and LOVE it!!! This card uses Concord Crush and Crumb Cake. Such a great card.
I think I need to really start playing the challenges again, because that's when I create my own cards.....big cheesy grin inserted here.
Thanks for peeking in.
Have a wonderful day.

Tuesday, March 8, 2011

Kind, Wonderful friends are Bliss

I saw a similar card on someone's blog, showing a really cute card made by Tenale Williams. I liked it so much, like I do best, I made one almost just like it.
It uses Blushing Bride and Soft Suede cardstock and DSP. I used the Bliss stamp set and the All Holidays stamp set for the sentiment. I did use retired ribbon for my bow, but it could be replaced with some of the current ribbon very easily. And then the inside, well it got some loving too.
I have a dear friend whose mother is in the hospital right now, and she is dealing with that. So, I made this card for her so she would know that I was thinking of her.

Thanks for peeking in.

Have a wonderful day.

Wednesday, March 2, 2011

Chocolate fixes everything....

I, personally, think that chocolate can fix a lot more than duct tape!!! Those are just my thoughts and opinions, but they are heartfelt opinions nonetheless....hahahaha
Yep, I've done it again. I've cased another adorable thing from Dawn's blog.....thanks for all the inspiration Dawn.....(big cheesy grin). If you haven't checked out her blog yet, go to my sidebar and click on DoStamping....you won't be disappointed I promise. In fact, you will see lots of her projects that shes done lately as some of the things I've posted lately too ....oops. This adorable chocolate box container is made with that adorable Petal Cone die from the Occasions Mini Catalog. I didn't want that at first.....what was I thinking?????
Inside, of course, are some yummy chocolate treats as a thank you to my customers for their orders.
For all the details, go to Dawn's blog and scroll through. She has a wonderful tutorial on how to make these little critters. I didn't want to give you the direct link because I want you to see how wonderful her blog is. That's the least I can do, since I keep copying everything she does lately.

Thanks for peeking in everyone.
I hope your day is filled with lots of things that make you happy......you know, like chocolate!!!

Tuesday, March 1, 2011

Recovering ... and a tutorial

Yep, that is how I feel about birthday celebrations about now. I'm over them. ; )
That is our new puppy Daisy helping celebrate birthdays this weekend. She's pretty cute isn't she? It was my husband's birthday weekend and the celebrating seemed to go on forever. Thus, the lack of posting lately.
Dawn Olfcheske is going to keep me from looking at her blog, because I keep caseing her darling cards. This is one of them. I just thought it was so sweet and soft, I needed one of my own....hahaha
It uses those two wonderful stamp sets in the sale-a-bration catalog that I just love, Sweet Summer and So Happy For You. Then I had to make the inside just as cute.
I thought it would make a really cute post it note holder too.
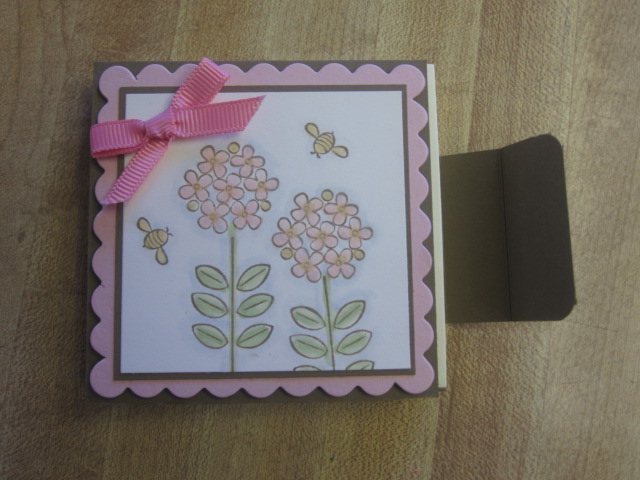
What do you think? I made this one to close sideways this time. I popped the top up on dimensionals so that the flap could tuck under to hold it closed.
Here it is with the flap sticking out so you could see it.
And here it is open.
I put together a tutorial for the one that closes from the top.
Cut your cardstock 8 1/2" x 3 1/4". Score at 2", 2 1/2", 5 1/2", 6".
Use any decorative edge punch and punch along the edge on the top. You can see in this picture that I took DSP and decorated the front and inside with it.
Sorry for the blurry picture. Put some sticky strip on the middle section and adhere your post it note.
Then just decorate it however you like.
For the side post it note: my cardstock was 6 1/2"x 3 1/4". Scored at 3" & 3 1/2". The flap is measured at 2 3/4" x 1 3/4", and scored at 1 1/2" and 2" and corner rounded on 2 edges. I just attached it to the back with some sticky strip.
They are really easy and fun to make.
Now go make some for yourself.
Thanks for peeking in.
Have a wonderful day.

Friday, February 25, 2011

Easy Peasy

This is another easy and fun card I made for my birthday stash.
I used the Apple Blossoms from the Level 2 Hostess set and stamped it in Cherry Cobbler and cut it out. I then popped it up with some dimensionals, added a button with some linen thread strung through it, and layered it on some Daffodil Delight and Cherry Cobbler. Simple and easy, but nice to have on hand.
Thanks for peeking in today.
Have a great day today.

Thursday, February 24, 2011

My husband's birthday

Today is my hubby's birthday. This is not the card he will be getting from me, but it is a birthday card nonetheless.
I have been wanting to play with the new spinner cards.
I stamped it on whisper white card stock in Pacific Point, Real Red, Old Olive and Daffodil Delight and then cut out each little section and glued them together. I felt it would be easier to do that than use the markers....or maybe I was just lazy that day...hahahaha You can't really tell, but I also ran the Real Red through the Big Shot with a texture plate for some fun little polka dots. Polka dots say party to me.
Thanks for peeking in.
Have a fun day today.

Wednesday, February 23, 2011

WOW!! WOW!! WOW!! & WOW!!

I think this is really a first for me. I'm speechless!!!! I really had NO idea that I had so many people that peeked into my little blog. I have had 4... yes 4... sweet, wonderful people award me with the Stylish Blogger Award in the last week. That's just crazy!!!


I feel so honored that people are actually out there peeking into my little world of paper therapy. So, to thank these sweet, wonderful ladies, I am asking you to go check out their great blogs too. They are:


Julie DiMatteo : http://www.thepaperpixie.com/

Chanda Stehlik: http://www.onecraftymommy.com/

Jennifer: http://www.punkydae.blogspot.com/

Sandy Dixon: http://mamia-stampingsanity.blogspot.com/

Part of the award is to do the following:
1) thank the person who gave this award to me and link it back to their blog

2) share 8 things about myself.....ugh!

3) pass this award to 8 other people that I have recently discovered

4) leave a comment on their blog so they can pass along the recognition.

So, to get the worst part of this over with....8 things about me.

1) I love to play with paper, but more than that I love being a wife, mother of 5 and grandmother of 5. My family is my whole world!!!

2) I work at the local High School and help with 3 different Science teachers!?!?! How on earth did that happen I ask myself!?! Why Science and not the Art department....hahahaha. I have worked there for the past 15 years, and was there while my 5 children went through high school. It was great.

3) I am a chocoholic!!! I do love my chocolate. yummy

4) I HATE wearing shoes!! My feet get clausterphobic! As do I actually. ; )

5) I have only been an active Stampin Up demonstrator for a little over a year. Before that, I was just a hobbyist. One day, I will become just a hobbyist again. ; )

6) I love to watch shows like: CSI, Law and Order, The Closer, The Mentalist....while I'm crafting. Oh yeah, and Survivor of course.

7) I haven't read a book since I started the whole Twilight Saga....great books by the way....which makes me kinda sad, because I used to read a lot. I just can't pick up a book lately to just sit and read for enjoyment. Weird huh? One day I will again.

and finally 8) I am very excited to go to Stampin Up's convention again in July. It is soooooo much fun.

Now, for the fun, yet difficult part. Fun, because I get to pass this award on to others, and difficult because....well, how do I choose only 8 wonderful crafters out there in cybercraftland?

So, my awards go to (drum roll please): Just click on their names to go to their amazingly "Stylish" blogs.

Chat Wszelaki

Dawn Olchefske

Jeanne Kupsh (she lives in Italy, how cool is that)

Melissa Davies

Debbie Henderson

Angela McKay

Gloria Cardoza

Diane

So go check out these ladies blogs, and get some inspiration for yourselves. Leave them a little love while you're there and tell them I sent you.

Thanks for peeking in today.


Birthday Presents

If you follow my blog and read any of my ramblings....hahaha. You will remember a few posts back when I said that I asked my daughter to go through the cards I made and pick out her favorites. This is the card she picked as her favorite. We almost made it for club Thursday, but I ran out of time to throw enough kits together.....Anyway, it was a BIG HIT!!!!
Everyone loved this card. It is so cute and look how easy and simple it is. What a great way to use up scraps too. I used the celebration DSP for this one, but I think any DSP would look cute of this card. I'm going to give you the dimensions for the presents if you want to make one for yourself.
The bottom red present is 2 1/2" x 1 1/4"
The middle polka dot present is 2" x 1"
and the top blue present is 1 5/8" x 1 1/8"
You just glue some ribbon on the top of the presents. I made a seperate bow and used dimensionals to put it on. I also popped the presents up on dimensionals too.
So fun, and so easy.
Thansk for peeking in.
Have a wonderful day.

Tuesday, February 22, 2011

The other door prize

This was the other door prize at club.
We learned how to make these cute and easy boxes a few months ago, and the next month we learned how to make the bows. So, I thought it would be a fun little reminder and have one as the door prize.....with some chocolate inside of course.... ; ) Here's a close up of the cute little tag I made for it with the Two tags Die. That little die is really a good die to have. You can do so many fun things with it. It's more than just a tag....it also makes some cute little boxes too. There are tons of tutorials out there in cyberspace showing how to make them. Google it and go make one for yourself. You won't be disappointed.
Thanks for peeking in.

Have a great day.

Monday, February 21, 2011

Fun door prizes

This was one of the fun door prizes I gave away at club Thursday night. It is soooo easy to make, and a fun little gift for a friend or coworker.
Here's a cute little peek at the post it note inside.
Maybe I'll post a quick tutorial on how easy this was to make just in case any one is interested.

Thanks for peeking in.
Have a great day.

Sunday, February 20, 2011

Nature walk with a twist

This is another one of the cards we made at club Thursday night.
I wanted to show everyone a fun new technique using the clear blocks.
See that crumb cake square stamped on that card underneath the bird, flowers and butterfly? Well, all we did was ink up the D clear block and stamped it directly to the card, and viola....you have a fun base for your card. We used Baja Breeze, Early Espresso and Old Olive for our colors. Then we gave the inside some loving too.
Such a pretty card. Funny story about this card too. I was showing my oldest daughter a bunch of cards I made and wanted her opinion on which ones we should make for club. When she got to this card, she said, "that's nice for an old person card". Well, all the "old people" hahaha loved it.
I won't be giving her this card for her birthday coming up in June....hahahaha

Have a great day.
Thanks for peeking in today.

Saturday, February 19, 2011

Turning 40

Today is my brother in laws 40th birthday. He just seems to young to be 40.
I have a really hard time coming up with masculine cards too. We made a bunch of birthday cards at club this week because who doesn't need birthday cards right? We didn't make this card because it uses NON.....eww gasp....Stampin Up stuff on the front. The "40" are cut out using the new dies from Papertrey Ink, but I could have easily used some from Stampin Up I guess. Anyway, I did teach them the little trick on how to use the word window punch to cut smaller words. : ) This is the card we all made at club. I also wanted to show them that you can use that must have cupcake punch in the new Occasions Mini Catalog, with or without the stamp set. You'll notice on the card with 40, the cupcake is stamped and then punched. On the card below, the cupcake is just punched. I also have a fun trick with the cupcake punch to show you here on this little blog of mine. As soon as I get some pictures of it, I will post it.
This card uses the one side of DSP from the Play Date DSP that I thought I might never use. So, I was glad to find a way to use it.

Thanks for peeking in today.
It's cold and rainy where I live. How's the weather where you are?